Tuesday, November 2, 2010

advent calendar

Advent Calendar


When my oh so crafty friend Kierste made this Advent Calendar she originally saw here I knew I had to have one. I loved the look and the ability to fit little trinkets, candy, etc. into the boxes for them to open every day. It was on my mind all year and I finally got to work in November to finally get it all together.


Supplies:
-Frame
- Metal fit to size
- Boxes
- Scrapbook paper, Mod Podge
- Vinyl, stickers, or other embelishments

1. I found a super ugly picture in the perfect size frame at Salvation Army. So I snatched it up, removed the picture, and spray painted it.


2. Then I called a local sheet metal place, told them the dimensions I needed, and picked up my metal an hour later for 6 bucks.

3. Then I went and bought 25 little boxes at Micheal's and painted them all black.


4. Next I glued magnets on the backs of all of them.
5. Once they were dry (or whenever I came back around to them - probably days later!) I traced the lids on scrapbook paper, cut it out, and Mod Podge'd the paper on them. I also applied another layer of Mod Podge on top of the paper as well.
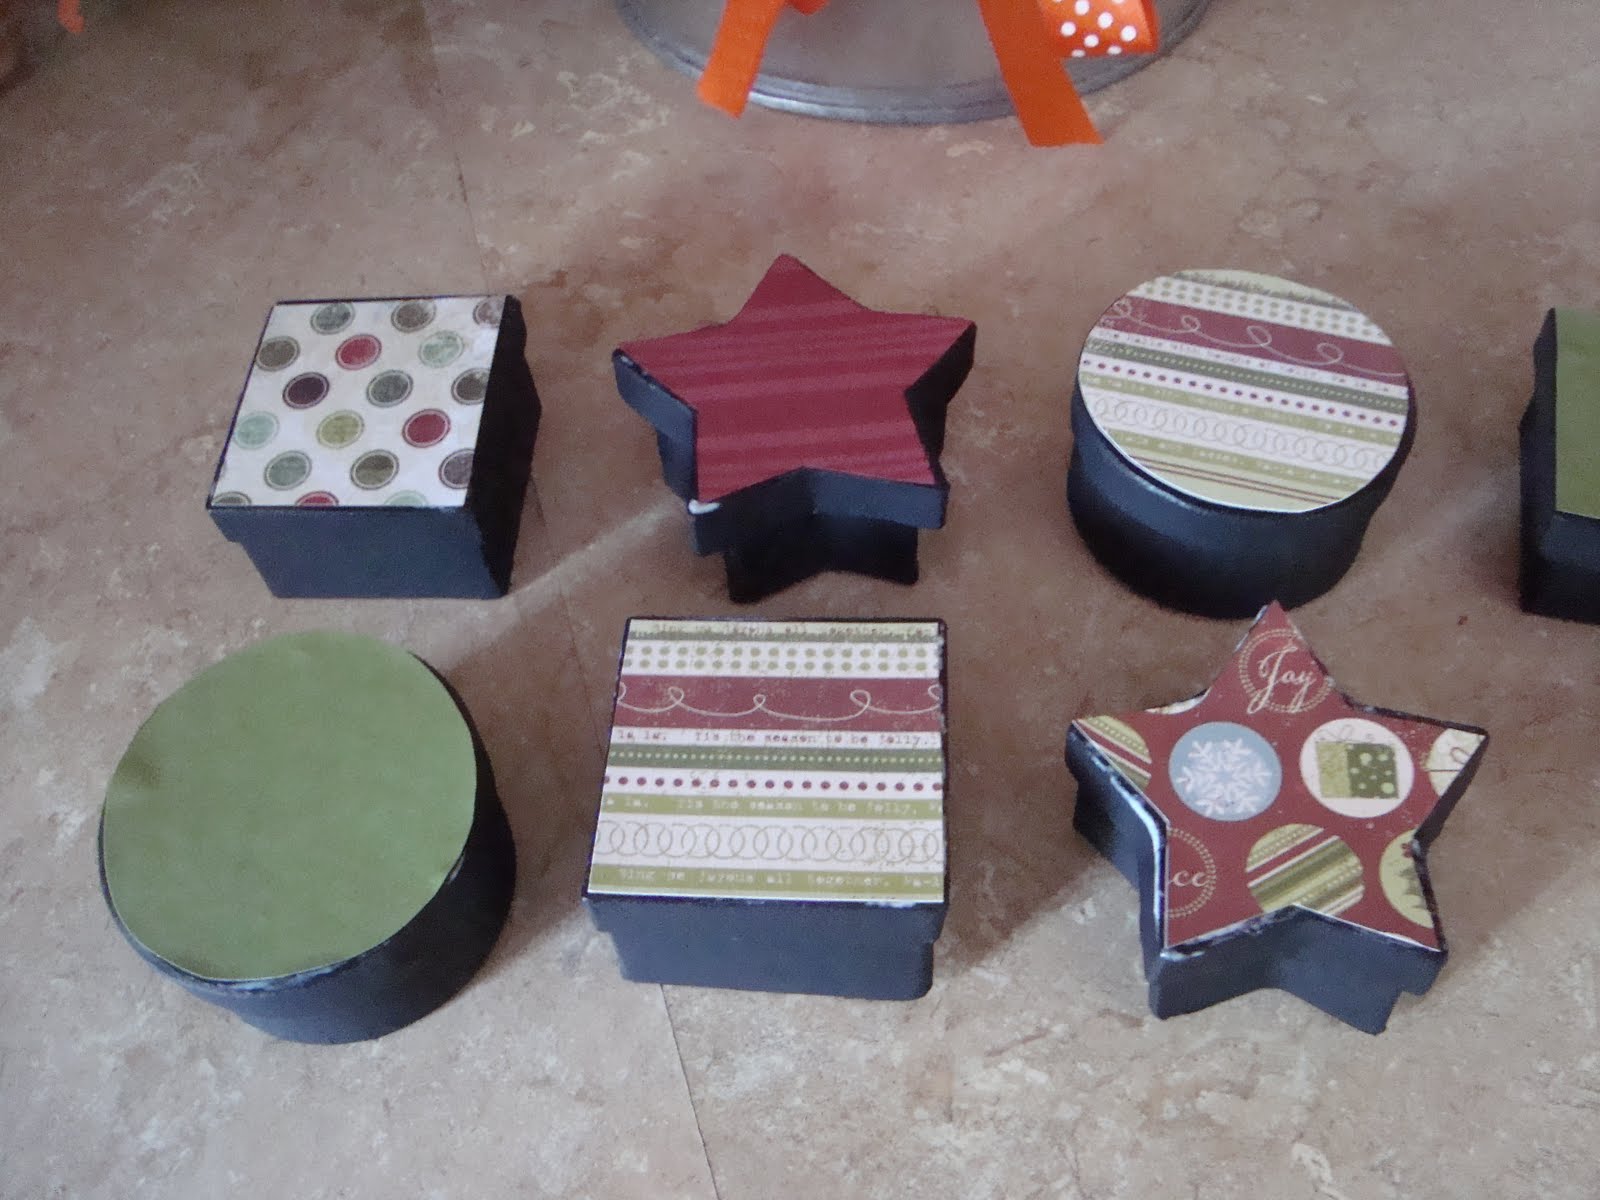
6. Last of all I ordered some vinyl from Writings on the Wall for a couple of bucks - and voila!

I love it and I think the kids loved it even more when they'd find a fun little something in it every day until Christmas!

Tuesday, July 20, 2010

ABC Identification

Lately I've been working with my 3 year old on being able to identify all of her letters. Here's a fun little game we played the other day to practice - and help me record which letters she still needs help with.

We have this dry erase sheet with the alphabet on it. You could use any paper with all of the letters on it - maybe even printing them out of order would provide a bit more of a challenge.

How to play:

1. Place a candy on top of each letter (we used mini M&M's.)

2. Have the child pick a letter on the board and say it out loud. If they identify it correctly they get the M&M. If they don't get it right the other person says it correctly and they get the M&M.

3. Continue doing this (I always let her go first but if two children were playing together they would alternate turns) until you have gone through the entire alphabet.

Playing this game was really helpful for me and I kept a small piece of paper by me and recorded each of the letters she didn't identify correctly so that we could focus more on those ones in the future.


Have fun!

Wednesday, July 14, 2010

Time Out Chair

I bought this cute little chair at Robert's (oh how I miss you craft store) in Utah before we moved from there. We didn't have kids yet but I was pregnant and loved the thing and knew I would probably use it in the future.

Well we've definitely used it and now that little one is 3 years old now I still had yet to ever get around to painting it. Mostly because I had NO CLUE what color to do it.

So I finally decided to go simple and painted it my new love Heirloom White by Rustoleum mainly because it will fit in in just about any room in our house. I added some stain and now it sits in the corner ready and waiting to be used.

Monday, July 12, 2010

Calendar/Numbers

After I finished my 'paid with real money' teaching job I left quite a bit of stuff behind. So when I was at the dollar store the other day and saw this calendar complete with all the accessories I knew I had to scoop it up. I took it home adhered magnets to the back and stuck it on the fridge. Then I took all the individual numbers, laminated them, and adhered magnets to the back of them and stuck them to the fridge.

Now although more often then not the calendar usually looks like this due to a cute little 1 year old running around having this on the fridge provides a daily opportunity for me to talk with and teach my 3 year old more about months, day of the week, and numbers.

So for under a couple of buck I think this small investment will pay off - and it surely provides some entertainment during meal prep time :)

Saturday, July 10, 2010

Cabinet Door Frames

When I saw this idea over at The Creative Crate I was instantly in love! My only problem...I didn't have any cabinet doors hanging around. So a few weeks later when I was at a church rummage sale and came across these babies for a buck - I knew I had to scoop them up!

Items you'll need:

- Cabinet doors/wood
- paint color of your choice
- metal clip
- ribbon
- drill

Directions:

1. I first removed all the hardware and gave the cabinets a light wipe down.

2. Then I patched and sanded the holes where the hardware had once been.

3. Then I did not prime :0 - I just sprayed on two coats of Rustoleum Heirloom White in Satin and when they were all dry I sanded them down a little and applied a little stain on the edges using a cut up t-shirt.

4. The hubby drilled some holes at the top for me so I could string some ribbon (all of it was bought at Walmart for 1.99) through and then I just hot glued the metal clip (I got a package of 2 for a buck at the dollar store) on.

5. My frames are larger than hers so my almost 8x10 picture is too small. But I measured the area and an 11x14 is going to fit perfectly. Now I just need to order my cute family pic from Sam's Club in an 11x14 (only 2 bucks) and I'm good to go.

So all in all this total project cost my less than $15 dollars! They're now a pretty piece sitting on top of our piano waiting till I find a more permanent home for them!

Thursday, July 8, 2010

Chalkboard Labels

Who doesn't love to have things labeled? Especially when they're decorative and cute!!!

A few months ago I brought home a 99 cent dresser I purchased from Goodwill. The reason it was 99 cents was because the top two drawers were missing. Well of course Micheal's came to the rescue and I just happened to find two baskets that were the EXACT size I needed to fit the empty spaces. So I purchased those with coupons for $12 each and then came these little labels.

Items you'll need:
- wood shape/plate/anything you want to paint
- painter's tape
- chalkboard spray paint
- drill or adhesive
- jute/ribbon/some type of hanging material

Directions:

I bought these two little wooden squares for 99 cents at Micheal's.
I then painted them a light tan using craft paint.
Then I taped them off to create a rectangle in the middle.

Then I spray painted them with this chalkboard paint.
Then I used some chalk and labeled them.

Then the hubby drilled some holes in them through which I strung some jute and tied them to the outside of my baskets.
They now sit in our spare bedroom for guests to easily find things they may be needing. And maybe one day I'll get around to finishing and showing you what sits on the top of the dresser - oh and changing that ugly hardware! One day... :)

Thursday, June 24, 2010

Stool Redo

I'm a shortie. Just a few inches over five feet and so when needing things in the high cupboards a kitchen chair has always come to the rescue. Well a few months ago (yes I've really been slacking on projects lately - warm weather hits and I want to be outside all day!) I found this cute stool at a local church's rummage sale for only $2! It was the perfect height for myself and my little ones ~ it just needed a little sprucing up!


No cleaning, no sanding, no priming. Out came the black spray paint and - TA DA! A new little stool that matches my kitchen - I love it. It's amazing what a little bit of paint will do - try it out :)